
Guest Blog: How To Pack A Portage Pack
Today’s guest blog post comes from Bill Ostrom of Ostrom Outdoors on how to pack a portage pack.
4 proven tips so it feels lighter!
Let’s face it…canoe packs and barrels can be heavy. But that’s no reason you can’t plan a canoe trip with lots of portaging. Imagine leaving the crowds behind and getting deep into the wilderness. A couple of portages will do that.
Can you eliminate the weight in your portage pack? Sadly, oftentimes you cannot!
But you’ll be happy to hear, that you can pack and adjust your canoe pack or barrel harness to carry weight more efficiently, so it actually feels lighter!
To be right upfront with you…I’m a gear freak. I use it, design it and am always testing and evaluating gear, especially canoe trip gear.
My dad got me out canoe tripping as a kid, and I feel my life is not complete without a long trip each summer. At least one!
My love for designing portage packs started in 1987. This was back when nylon fabric and webbing were becoming more common…back when we were agonizing under the weight of canvas canoe packs with leather shoulder straps.
Then working with Queen’s University and the Canadian Armed Forces in the mid-1990s expanded my knowledge of “load control” and “load carriage”.
I.e., strategies and designs that increase comfort and safety when carrying a heavy load. You may not be carrying 100+ pounds like a soldier, but a heavy canoe pack on a rough portage trail can be challenging.
Keep reading to learn a bit of load carriage science and how to pack your portage pack and enjoy portages more.
How “load carriage” science applies to packing your portage pack

Your goal is “load transfer” – getting the weight of your canoe pack close to your body.
Specifically, transferring the weight from your shoulder straps to your shoulders and down your spine to your hips. Your hip belt also transfers weight directly to your legs, the strongest part of your body
In general, an internal frame portage pack, like our Wabakimi will have better load control than a soft pack like our Winisk or Quetico. And a pack that fits you well or is custom fit like ours will have better weight transfer.
Here are 4 easy tips to pack any canoe pack or barrel so it feels lighter on the portage, regardless of what type of pack you have.
Tip #1 - pack your portage pack for better load control
How you pack your canoe pack is the single most important step in load control. Your goal is to get heavier gear closer to your back and higher in your pack.
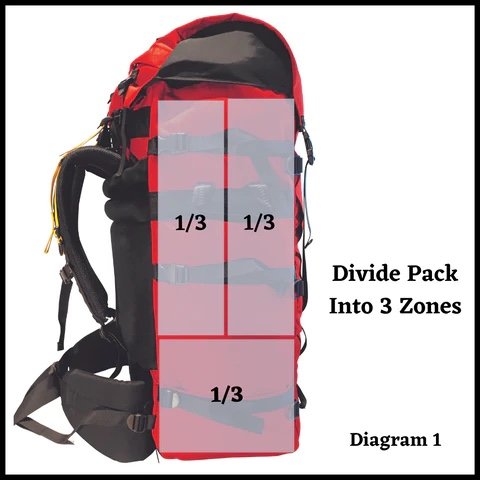
Here’s how you do that. Divide your portage pack into three equal load zones. In Diagram 1, you see the three load zones. In Diagram 2 you see how to load gear according to weight (as much as possible).

So…what goes where?
It is important to build a platform in the bottom zone of the canoe pack using light- and medium-weight gear. For example, gear like your sleeping pad, light clothing, tent (no poles or pegs) and sleeping bag go in the bottom, yellow zone of the pack.
Consider using compression sacs for all your soft, bulky gear, and packing gear into smaller parcels. (We even stuff our tent into a compression sac.) Avoiding large bulky items gives you more flexibility in loading your pack and controlling weight placement.
Your heaviest, most dense items go in the zone closest to your back (blue zone). For example, liquids, fuel, stove, tarp, tent poles, repair kit, first aid kit, or wet gear.
For the “light” zone farthest from your back – pack your lightest, least dense gear. For example, sleeping pad, crocs, fleece, toilet paper, and kitchen utensils.
The same packing principles work for your canoe food barrel. Create a layer of food on the bottom e.g., dehydrated suppers. (Perfect for reducing weight on a canoe trip.)
Then pack the heavy, dense cheese, salami, and liquids closest to your back. Then light bagels and rye crisp farthest from your back.
Experiment with this strategy of loading your portage pack and pay attention to how you feel.
Read further for three more important tips for a comfortable portage.
The Science of Centre of Gravity (CoG)
Before I share the last three tips, let’s take a step back and talk about what we mean by Centre of Gravity (CoG), and why it’s important for canoe tripping and a comfortable portage.
On the human body, COG is measured (this is a very simplified description) by having a person stand, hands down their sides, in socks or bare feet.
Science has determined that a person’s theoretical CoG is near the belly button, halfway between the lower back and belly. This can vary slightly depending on things like gender or body shape.

Why is your personal CoG important? It’s because the body’s CoG is your balance point, your equilibrium point. It is where your mass is concentrated.
Your body’s CoG is also a fulcrum point (defined as a pivot point or where a lever turns.) Your fulcrum point is your waist area. It is also your CoG and where you place your canoe pack’s hip belt.
Making sure your hip belt is placed properly on your hips helps with good load control.
That means all weight from your pack is transferred to your shoulders, down your spine and to this fulcrum point, i.e., your hip belt onto your legs.
The CoG in Your Pack Matters!
CoG is a big deal for portaging. Loading your portage pack as described above is all about getting its CoG as close to your back as possible.
The further away your pack’s CoG is from your back the more energy you use to transfer it to your back. Put simply, you will feel less comfortable and more tired if your canoe pack’s CoG is further away from your back.
TIP #2 - COMPRESSION IS KEY TO LOAD CONTROL
If your portage pack has compression straps - put them to good use! Use the side and lid compression straps aggressively.
Don't forget the three compression straps (snow cuff compression straps) under the lid as well. These three straps are critical in compressing the heaviest portion of your portage pack.


A smaller more compact load will make your portage more efficient and comfortable! And you’ll be less tired on your canoe trip.
WHY? A larger bulkier load will be further from your back. The further the load is from your back the more energy you use to pull the weight forward.
As mentioned previously, one important way to compress your load is to use compression sacs to compress soft canoe trip gear like clothes, sleeping bags etc.
It is also critical that you tighten all the compression straps on your portage pack, and all the straps holding the barrel to the barrel harness. Be aggressive, smaller is better!
TIP #3 - USE YOUR PORTAGE PACK’S LOAD LIFTER & STABILIZER STRAPS
Check out your canoe pack or barrel harness…do you have load lifter straps on the shoulder straps? How about hip belt stabilizer straps? (See Figure 4)

The yellow straps on the shoulder straps are called load lifter straps. They are attached to your shoulder straps and are threaded through two buckles attached directly to your portage pack.
Pay attention when you tighten these. As you tighten, notice how the weight of your canoe pack transfers to your shoulders, down your spine to your hip belt. This is load control! - getting your pack’s weight closer to your body’s CoG.
The hip belt has three adjustments that can help with load transfer, i.e., the centre buckle and the two hip belt stabilizer straps. By tightening all three straps you are transferring weight from your pack to your hips.
The chest strap (sternum strap) can be adjusted both horizontally and vertically. This strap helps with personal comfort and stabilizes the portage pack on your body. The barrel harness has the same straps, so put them to work.
Check out our Youtube site for videos on how to properly adjust your canoe pack.
THE IMPORTANCE OF A CUSTOM FIT PORTAGE PACK.
You can use these four tips with any portage pack, backpack, or barrel harness on the market.
However, if the pack doesn’t fit you, then there will be only so many adjustments you can make.
That’s why we offer custom fit canoe packs. We select the proper size shoulder straps, torso and hip belt based on your measurements. Then each portage pack or barrel harness is assembled just for you, so you can transfer the weight to your hips and control the load better.
A custom fit pack is much more comfortable and efficient so you save energy!
TIP #4 GOT A TUMPLINE ON YOUR PORTAGE PACK OR BARREL HARNESS?
We’ve all seen photos from Asia, South America and Africa of people carrying heavy loads on their heads. The weight is transferred directly down the spine to their hips and legs (CoG)!
Closer to home, Voyageurs carried a standard load of two fur bales of 180 lbs using only a tump or head strap. A press was screwed down compressing the fur bales into more compact loads. Sound familiar?
Do you use a tumpline on your canoe pack? Ever thought about it?
The human body is perfectly constructed to carry heavy loads directly on the head, transferring weight down our impressive spine to our hips and legs, our strongest limbs. Very efficient!
So, common sense needs to be used here… I am not suggesting that we carry our portage packs only with a tumpline.
But we can look to the research and science behind those cultures and use it to our advantage on a portage. It might simply be using a tumpline more frequently when carrying heavy loads over longer portages.
Be aware of your limits, many of us no longer have the neck muscles of the Voyageurs. But it can be used as a tool.
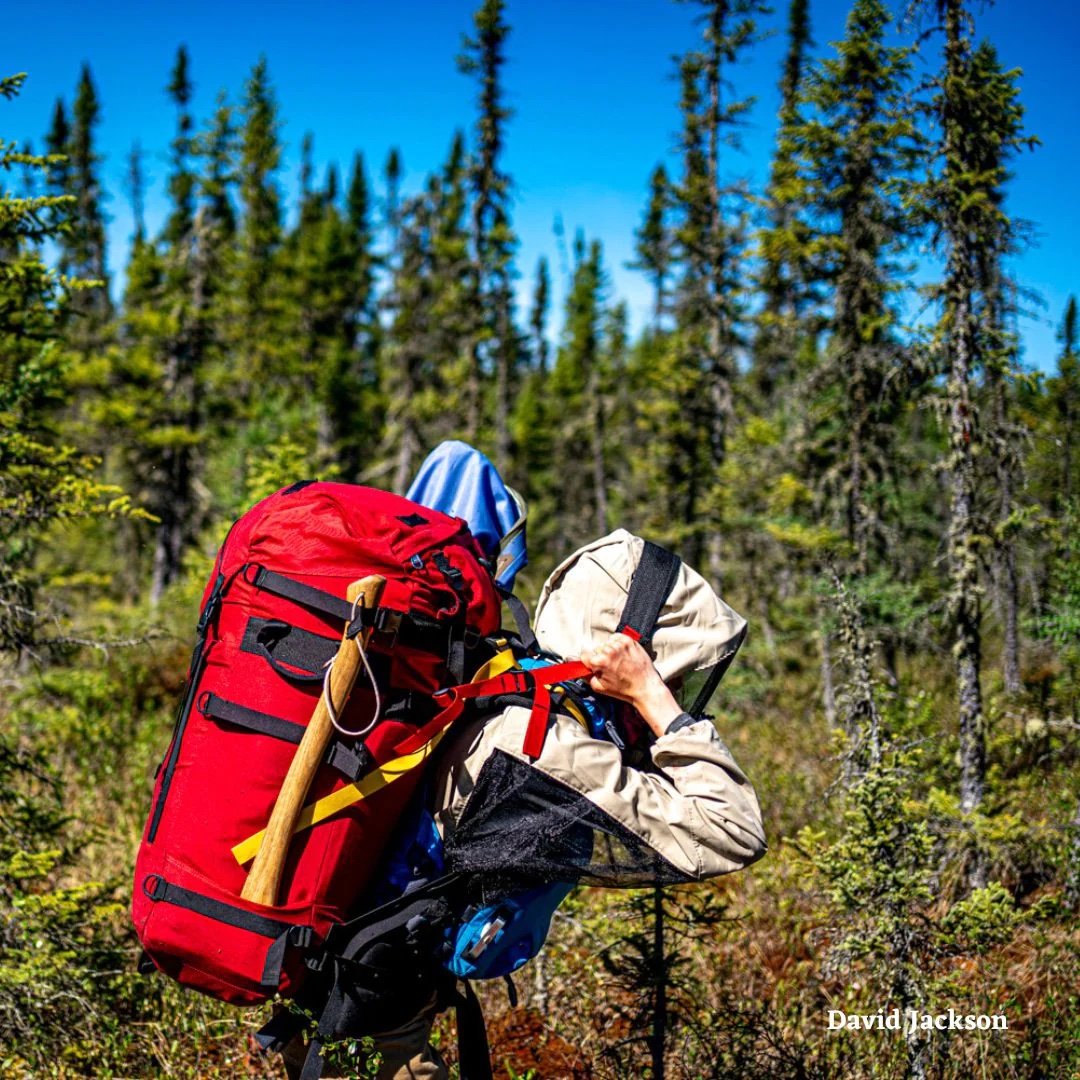
(FYI, this photo is of Leah Maki-Jackson. She and David Jackson paddled 60 days from Armstrong to Fort Severn Ontario in 2021. Check out the blog of this amazing adventure.)
FEELING BETTER ABOUT PORTAGING ON YOUR NEXT CANOE TRIP?
Portages can help you truly get away from it all on a canoe trip. Follow these tips for a more comfortable carry so you can enjoy all that a portage has to offer.
If you’re still struggling with a heavy load, or with a portage pack or barrel harness that doesn’t feel good, reach out and I can see if I can help.
Bill Ostrom - Canoe Pack Designer, Ostrom Outdoors


